How to Propagate Indoor Plants: A Beginner’s Guide
Indoor plant propagation is a rewarding skill that allows you to expand your green family without breaking the bank.
As an experienced plant enthusiast, I’ve found that propagating indoor plants is not only a cost-effective way to expand your collection but also an incredibly rewarding experience.
In this comprehensive guide, we’ll explore various methods of plant propagation, tips for success, and how to troubleshoot common issues.
Table of Contents
Introduction to Plant Propagation

Plant propagation is the process of creating new plants from existing ones. This fundamental skill allows indoor gardeners to multiply their plant collection, share plants with friends, or save a dying plant. Whether you’re a beginner or an experienced gardener, understanding propagation techniques can enhance your indoor gardening experience and deepen your connection with your plants.
Benefits of Propagating Indoor Plants
Propagating your indoor plants offers numerous advantages:
- Cost-Effective: Save money by growing new plants from cuttings or divisions instead of purchasing new ones.
- Preservation: Maintain rare or sentimental plants by propagating them.
- Sharing: Gift propagated plants to friends and family, spreading your passion for gardening.
- Rejuvenation: Restore overgrown or unhealthy plants by propagating healthy sections, encouraging new growth.
- Connection: Cultivating new plants fosters a deeper connection with nature and enhances your gardening skills.
- Customization: Create unique plant combinations or develop your own cultivars through selective propagation.
Best Time to Propagate Indoor Plants
While indoor plants can often be propagated year-round, spring and early summer are generally the best times due to:
- Increased Natural Light: Longer days provide more light for new growth.
- Warmer Temperatures: Ideal for root development and growth.
- Plants Entering Active Growth Phase: Many plants are naturally ready to grow during these seasons.
✅ Pro Tip: Some plants have specific propagation windows. Research your plant’s needs for best results.
Tools and Materials for Propagation
Having the right tools can make propagation easier and more successful:
- Clean, Sharp Pruning Shears or Scissors: For making clean cuts.
- Rooting Hormone (Powder or Gel): To promote root growth.
- Well-Draining Potting Mix: Essential for healthy root development.
- Small Pots or Propagation Trays: For planting cuttings or divisions.
- Clear Plastic Bags or Propagation Domes: To maintain humidity for cuttings.
- Labels and Markers(optional): To identify different cuttings or propagation attempts.
- Spray Bottle: For misting and maintaining humidity.
- Light Meter (optional): To measure light levels for light-sensitive plants.
- Heat Mat(optional): To provide bottom heat for seed germination.
- Thermometer(optional): To monitor soil and air temperature.
Preparing for Propagation
Before you begin:
- Ensure Your Plant is Healthy: Check for pests or diseases that could affect propagation.
- Clean and Sterilize All Tools: Prevent contamination that could harm your cuttings.
- Prepare Your Propagation Area: Ensure it’s clean, organized, and has adequate lighting.
- Gather Necessary Materials: Have everything ready to go, including pots, soil, and labels.
Soil vs. Water Rooting Method
When propagating plants through stem cuttings, you have two primary options for encouraging root growth: soil rooting and water rooting. Each method has its advantages and is better suited for certain plants.
👉 Soil Rooting
Soil rooting involves planting the cutting directly into a well-draining potting mix.
Advantages:
- Stronger root system development
- Less transplant shock when the cutting is ready to be potted
- Reduced risk of root rot
Best for:
- Succulents and cacti
- Plants prone to root rot
- Species that naturally root quickly
Steps:
- Prepare a well-draining potting mix
- Make a hole in the soil with a pencil or stick
- Dip the cutting in rooting hormone (optional)
- Insert the cutting into the hole and gently firm the soil around it
- Water lightly and place in a warm, bright spot out of direct sunlight
👉 Water Rooting
Water rooting involves placing the cutting in a container of water until roots develop.
Advantages:
- Easy to monitor root development
- Reduced risk of dehydration for the cutting
- Often faster initial root growth
Best for:
- Many tropical plants
- Plants with soft, herbaceous stems
- Species that naturally grow near water
Steps:
- Fill a clear container with room temperature water
- Place the cutting in the water, ensuring nodes are submerged
- Change the water every 3-5 days to prevent bacterial growth
- Once roots are 1-2 inches long, transplant to soil
👉 Choosing Between Soil and Water Rooting
Consider these factors when deciding between soil and water rooting:
- Plant Species: Research your specific plant’s preferences
- Your Experience Level: Water rooting can be easier for beginners to monitor
- Time: Water rooting often shows faster initial results
- Long-term Health: Soil rooting typically produces stronger, more resilient plants
Types of Plant Propagation
There are several methods of plant propagation, each suited to different types of plants and situations:
- Stem Cuttings
- Leaf Cuttings
- Root Division
- Air Layering
- Seed Propagation
Let’s explore each method in detail.
Propagation by Stem Cuttings
Stem cutting is one of the most common and versatile propagation methods. It can be used for various indoor plants and is relatively easy for beginners.
👉 Steps for Stem Cutting Propagation:
- Select a Healthy Stem: Choose a stem that is healthy and has several leaves.
- Make the Cut: Using clean, sharp scissors, cut just below a node (where leaves attach to the stem). A cutting length of 4-6 inches is ideal.
- Remove Lower Leaves: Trim off the lower leaves, leaving 2-3 at the top to reduce moisture loss.
- Apply Rooting Hormone: (Optional) Dip the cut end in rooting hormone to promote root growth.
- Planting: Place the cutting in moist, well-draining soil or a glass of water.
- Maintain Humidity: If using soil, cover the cutting with a plastic bag to maintain humidity (remove it periodically to prevent mold).
- Provide Light: Keep in a warm, bright location out of direct sunlight.
- Monitor and Care: Keep the soil moist but not soggy. If in water, change it every few days.
👉 Examples of Plants Suitable for Stem Cutting Propagation:
- Pothos (Epipremnum aureum): Very forgiving and roots easily in water or soil.
- Philodendron: Thrives with stem cuttings; ensure at least one node is included.
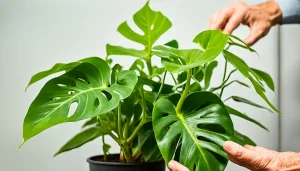
- Monstera deliciosa: Stem cuttings with aerial roots are ideal for propagation.
- English Ivy (Hedera helix): Grows well from cuttings in water or soil.
- Rubber Plant (Ficus elastica): Can be propagated through stem cuttings, although it’s slower than some other plants.
✅ Pro Tip: For woody stems, make a small wound on the side of the cutting to encourage root growth.
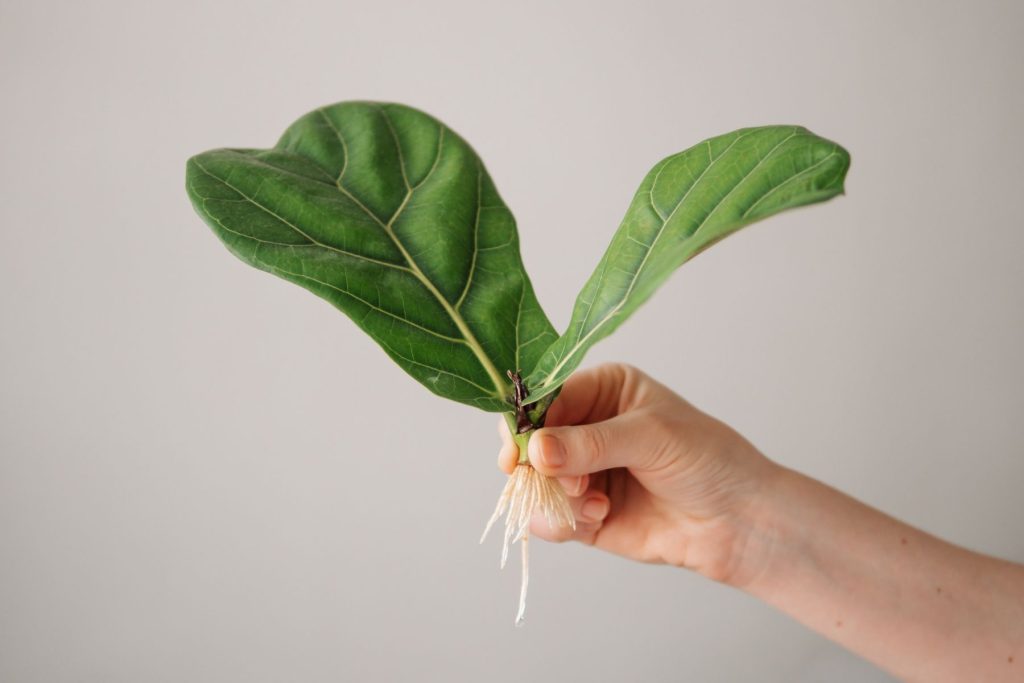
Leaf Cutting Propagation
Some plants can be propagated from a single leaf or leaf section. This method is particularly effective for plants with thick, fleshy leaves.
👉 Steps for Leaf Cutting Propagation:
- Select a Healthy Leaf: Choose a healthy, mature leaf from the plant.
- Make the Cut: Depending on the plant, you may need to cut the leaf into sections or use the whole leaf.
- Insert into Medium: Plant the cut edge into moist propagation medium (soil or a seed-starting mix).
- Maintain Environment: Keep the medium moist and in a warm, bright location with indirect light.
- Wait for Growth: New growth may take several weeks to appear, so be patient.
👉 Examples of Plants Suitable for Leaf Cutting Propagation:
- African Violets (Saintpaulia): Known for their beautiful flowers, they propagate easily from leaf cuttings.
- Snake Plants (Sansevieria): Leaf cuttings can root successfully, though they may take time.
- Begonias: Many varieties can be propagated from leaf sections.
- Peperomias: Leaf cuttings work well for this diverse group of plants.
- Jade Plant (Crassula ovata): Leaf cuttings can root and develop into new plants.
Root Division Propagation
Root division is ideal for plants that naturally produce multiple stems or crowns. It’s an excellent way to rejuvenate overgrown plants or create multiple plants from a single large specimen.
👉 Steps for Root Division:
- Remove the Plant: Carefully take the plant out of its pot, being gentle with the roots.
- Separate the Roots: Gently separate the root ball into sections, ensuring each section has roots and stems.
- Trim if Necessary: Cut away any dead or rotting roots.
- Replant: Plant each division in fresh potting soil, ensuring the roots are well covered.
- Water and Care: Water the newly potted divisions thoroughly and place them in appropriate light conditions.
👉 Examples of Plants Suitable for Root Division:
- Spider Plant (Chlorophytum comosum): Known for its baby “pups” that can be easily divided.
- Peace Lily (Spathiphyllum): Can be divided to create new plants while maintaining the parent plant.
- Dracaena: Many varieties can be propagated through root division.
- Chinese Evergreen (Aglaonema): Thrives with root division, producing multiple new plants.
- Ferns (various species): Often benefit from division to maintain health and vigor.
✅ Pro Tip: Spring is often the best time for root division, as plants are entering their active growth phase.
Air Layering
Air layering is a propagation method that allows you to create new plants from existing ones while they are still attached to the parent plant. This method is especially useful for larger plants or those with woody stems.
👉 Steps for Air Layering:
- Choose a Healthy Stem: Select a healthy stem that is at least one year old.
- Make an Incision: Create a small incision in the bark about one-third of the way through the stem.
- Apply Rooting Hormone: Apply rooting hormone to the wound to encourage root growth.
- Wrap with Moss: Wrap the area with moist sphagnum moss and cover it with plastic wrap to maintain humidity.
- Secure the Wrap: Tie both ends of the plastic wrap to keep moisture in.
- Wait for Roots: Check periodically for root development; this can take several weeks to months.
- Cut and Plant: Once roots are established, cut below the new roots and pot the new plant.
👉 Examples of Plants Suitable for Air Layering:
- Rubber Plant (Ficus elastica): Ideal for air layering due to its thick stems.
- Dieffenbachia: Can be propagated effectively using this method.
- Dracaena: Air layering can produce strong new plants.
- Croton (Codiaeum variegatum): Works well with air layering to maintain vibrant colors.
- Schefflera: A robust plant that can be easily propagated through this method.
✅ Pro Tip: Keep the moss consistently moist throughout the rooting process to encourage healthy root development.
Choosing the Right Propagation Method
Selecting the appropriate propagation method depends on:
- Plant Species: Different plants respond better to specific methods.
- Available Materials: Ensure you have the necessary tools and materials for your chosen method.
- Your Experience Level: Some methods are more straightforward than others.
- Desired Outcome: Consider whether you want multiple plants or a single larger plant.
Research your specific plant to determine the most suitable method.
Caring for Newly Propagated Plants
Proper care is crucial for the success of your propagation efforts:
- Watering: Water lightly but frequently to keep the soil consistently moist. For water propagation, change the water every 3-5 days to prevent algae growth.
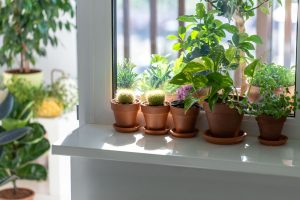
- Light: Place cuttings in bright, indirect light. Avoid direct sunlight which can scorch delicate new growth. If using grow lights, position them 6-12 inches above the plants for 12-16 hours daily. As roots develop, gradually increase light exposure.
- Temperature and Humidity: Maintain temperatures between 65-75°F (18-24°C) for optimal root development. Use a humidity tray or plastic dome to increase humidity around cuttings. Once rooted, slowly expose them to normal conditions, reducing humidity gradually.
- Fertilizing: Wait until you see new growth before fertilizing, usually 4-6 weeks after propagation. Use a diluted, balanced fertilizer at half strength initially.
- Monitor for Pests: New plants can be vulnerable to pests; inspect regularly.
Troubleshooting Common Propagation Issues
| Problem | Possible Cause | Solution |
|---|---|---|
| Rotting Cuttings | Overwatering or poor drainage | Improve drainage, reduce watering |
| Slow Root Development | Insufficient humidity or light | Increase humidity, adjust lighting |
| Leaf Drop | Stress or shock | Ensure stable conditions, be patient |
| Fungal Growth | High humidity, poor air circulation | Improve air flow, treat with fungicide if necessary |
| Yellowing Leaves | Nutrient deficiency or overwatering | Check soil moisture, consider light fertilization |
Proper preparation, care, and attention to environmental factors like light, moisture, and temperature are crucial for successful propagation.
As you embark on this journey, remember that patience is key; roots may take time to develop, but the rewards of nurturing new plants are well worth the wait.
Which plants have you already propagated? Share your experiences with us.