How to Repot Indoor Plants Without Killing Them
Repotting is one of the most rewarding aspects of plant care. It’s a chance to connect with nature, prepare your plants for a new season of growth, and closely examine how roots develop underground.
The result? Healthier, more beautiful plants. In this comprehensive guide, we’ll cover everything you need to know about repotting indoor plants, from choosing the right pot to troubleshooting common issues.
Jump to
What is Repotting?
.Repotting is the process of transferring a plant from one container to another, typically a larger one. When you purchase a houseplant, it usually comes in a nursery pot from the grower. While the plant can remain in this pot for some time, it will eventually need to be moved to allow for growth. Repotting not only gives the plant more space but also refreshes the soil, providing essential nutrients for continued growth.
Why Should I Repot My Plant?
Repotting offers several benefits for your plants:
- Provides More Space for Root Growth: As plants grow, their roots need room to expand. A larger pot allows for this natural growth.
- Introduces Fresh Nutrients: Over time, the nutrients in potting soil can become depleted. Repotting with fresh soil replenishes these nutrients, promoting healthy growth.
- Improves Drainage and Aeration: New soil can improve drainage, preventing waterlogged conditions that can lead to root rot.
- Allows You to Check and Address Root Health Issues: Repotting gives you the opportunity to inspect the roots for any signs of disease or damage.
- Stimulates New Growth: The process of repotting can encourage plants to grow new roots and leaves as they adapt to their new environment.
- Gives You the Opportunity to Update the Plant’s Aesthetic: A new pot can enhance the overall look of your plant display.
Signs Your Plant Needs Repotting
Look out for these indicators that your plant is ready for a new home:
- Roots Growing Out of Drainage Holes: If you see roots poking out of the bottom of the pot, it’s a clear sign that your plant has outgrown its container.
- Plant Requiring Water More Frequently: If your plant seems thirsty more often than usual, it may be a sign that it has outgrown its pot and is struggling to access enough soil moisture.
- Soil Drying Out Quickly: If the soil dries out too fast after watering, the roots may be filling the pot and leaving little room for soil.
- Stunted Growth: If your plant has stopped growing or is producing smaller leaves, it may be root-bound and in need of a larger pot.
- Visible Salt or Mineral Build-Up: If you notice a white crust on the soil surface or the pot, it indicates that salts are accumulating, which can harm your plant.
- Plant Becoming Top-Heavy or Tipping Over Easily: A plant that is too large for its pot may become unstable and fall over.
When is the Best Time to Repot?
Spring is generally the ideal time to repot, as plants are entering their active growth phase. During this time, they are more resilient and better able to recover from any stress caused by repotting. However, if necessary, you can repot during summer or early fall. Avoid repotting in winter when most plants are dormant and may struggle to recover from root disturbance.
👉 Seasonal Considerations
- Spring: The best time for repotting, as plants are waking up and actively growing.
- Summer: Possible but may stress the plant if temperatures are too high.
- Fall: Can be done if necessary, but be cautious as plants prepare for dormancy.
- Winter: Generally not recommended, as plants are in a resting phase and may not recover well from repotting.
How Often Should You Repot Your Plant?
The frequency of repotting depends on the plant’s growth rate:
- Fast-Growing Plants: These may need repotting annually or every 12-18 months. Examples include pothos, spider plants, and peace lilies.
- Moderate Growers: These plants may need repotting every 18-24 months. Examples include snake plants and ZZ plants.
- Slow Growers: Cacti and succulents can often remain in the same pot for 2-3 years or longer, depending on their growth rate.
If you want to maintain your plant’s current size, you can repot it in the same container. Remove some old soil, trim the roots (no more than one-third), and add fresh potting mix. This method allows you to refresh the soil without allowing the plant to grow larger.
Choosing the Right Pot
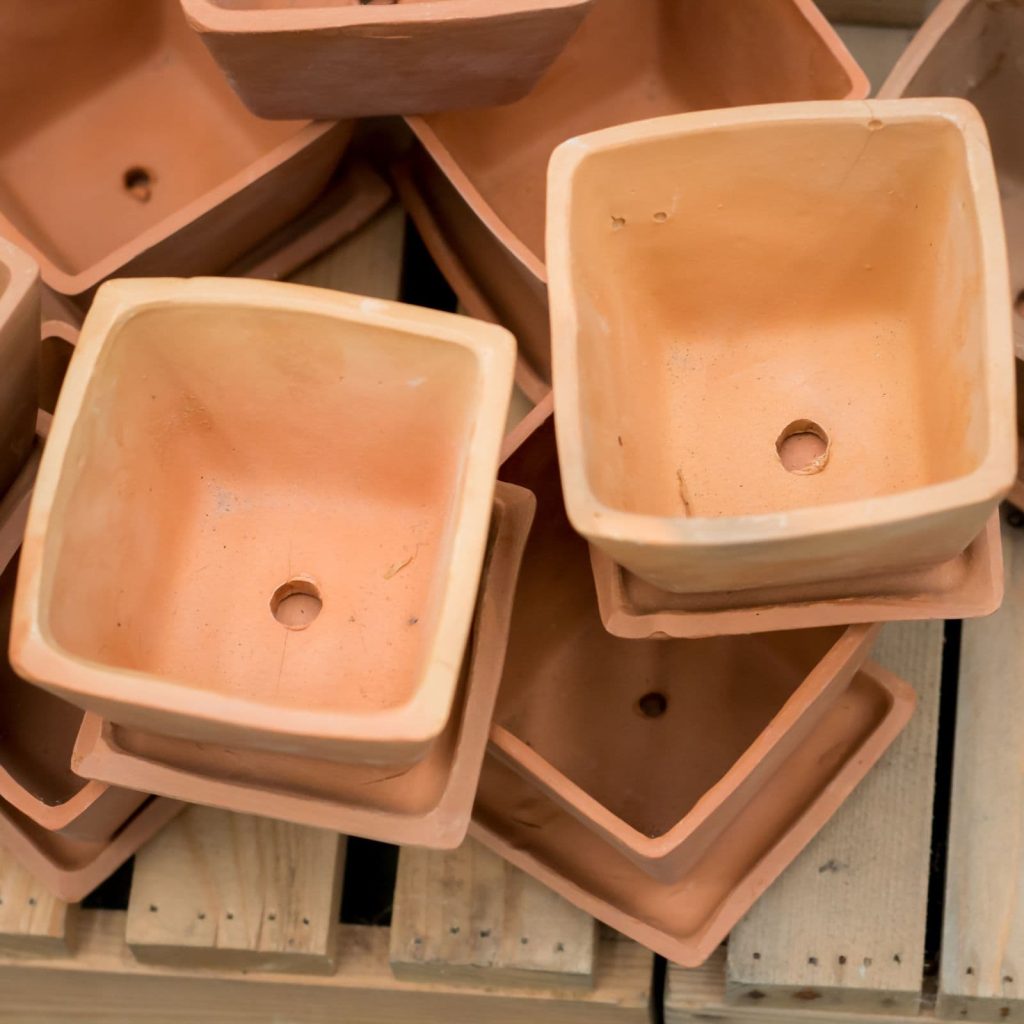
When selecting a new pot, consider these factors:
- Size: Choose a pot about 1-2 inches larger in diameter than the current one, or about 20% larger overall. A pot that is too large can lead to excess water accumulating at the bottom, which the plant cannot access with its short roots.
- Drainage: Opt for pots with drainage holes to prevent water accumulation and reduce the risk of root rot.
- Material: Consider terracotta for moisture control, plastic for lightweight options, or decorative pots for aesthetics.
✅ Quick Tip: No Drainage Holes?If using a pot without drainage holes, add a layer of hydro granules at the bottom to absorb excess moisture. However, be cautious with this method, as it can still lead to overwatering if not monitored closely.
Selecting the Right Soil
Different plants have different soil needs:
- Most Houseplants: A well-draining potting mix is suitable for the majority of indoor plants. Look for a mix that contains peat moss, perlite, and vermiculite for optimal drainage and aeration.
- Cacti and Succulents: These plants thrive in sandy, fast-draining soil. You can purchase pre-mixed cactus soil or create your own by mixing regular potting soil with sand.
- Orchids: Orchids require a special mix that mimics their natural growing conditions. Orchid mix typically contains bark, charcoal, and other coarse materials to provide good drainage and airflow.
Checking Root Health
Repotting is an excellent time to assess the health of your plant’s roots. Healthy roots are typically white or light brown and firm to the touch. When repotting:
- Remove Any Dead or Damaged Roots: Look for roots that are brown, mushy, or shriveled. These indicate root rot or damage and should be cut away.
- Gently Loosen Tightly Bound Roots: If the roots are tightly curled in the pot, gently separate them to encourage growth into the new soil.
- Trim Overgrown Roots: If the roots are excessively long, trim them back by no more than one-third to promote healthy growth.
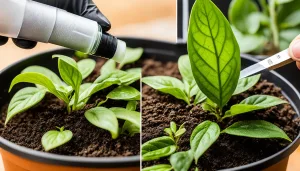
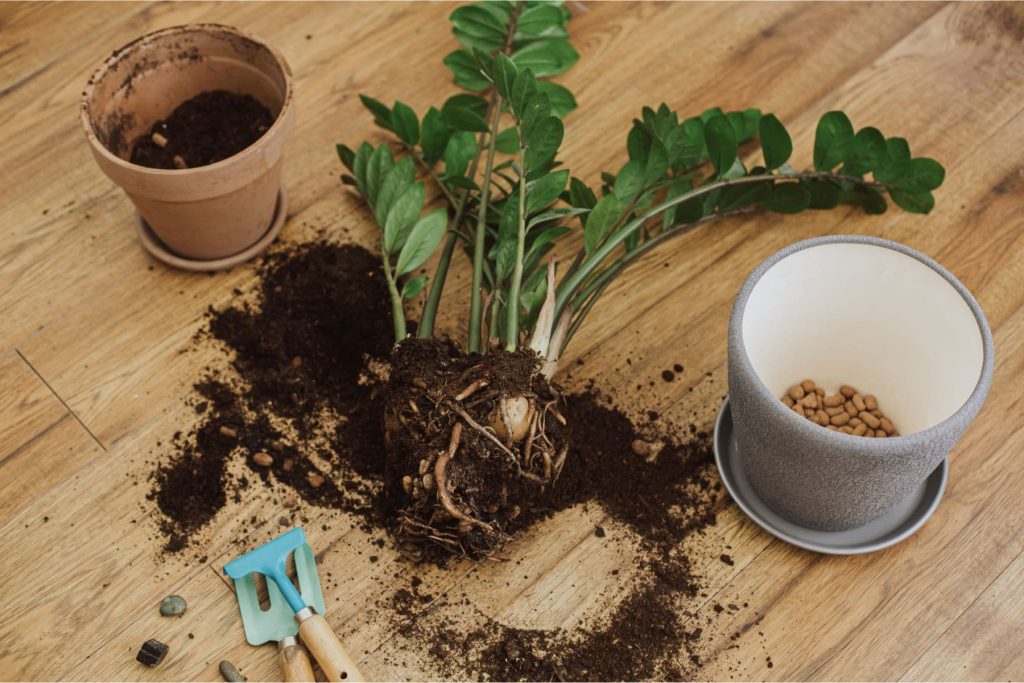
Step-by-Step Guide to Repotting
Follow these steps to successfully repot your indoor plants:
- Choose an Appropriate New Pot: Select a pot that is slightly larger than the current one, ensuring it has drainage holes.
- Select the Right Potting Soil: Choose a potting mix suitable for your specific plant type.
- Carefully Remove the Plant from the Old Pot: Gently squeeze a plastic pot to loosen the plant. If it’s stuck, cut the pot. For stone pots, carefully turn them upside down, supporting the plant at the base. If necessary, run a knife along the edge to loosen the plant.
- Check the Health of the Roots: Inspect the roots for any signs of disease or damage. Remove dead and infected roots and trim back any overgrown roots.
- Place a Coffee Filter Over the Drainage Holes: This will help prevent soil from falling out of the pot while still allowing excess water to drain.
- Fill the Pot with a Layer of Potting Soil: Add enough potting mix to create a base for the plant. Position your plant on top, ensuring that it sits at the same depth as in the old pot.
- Fill the Space Around the Root Ball: Add fresh potting soil around the roots, leaving a couple of inches of space between the top of the soil and the pot. This will help retain water without overflow.
- Water Your Plant: After repotting, give your plant a good drink to help settle the soil and provide moisture to the roots.
- Return the Plant to Its Original Spot: Place the repotted plant in its usual location and enjoy watching it thrive in its new environment.
Troubleshooting Common Repotting Issues
Even with careful repotting, you may encounter some issues. Here’s a quick troubleshooting guide:
| Issue | Possible Cause | Solution |
|---|---|---|
| Wilting After Repotting | Transplant shock | Provide extra care, maintain consistent watering, and avoid direct sunlight for a few days. |
| Yellowing Leaves | Overwatering or poor drainage | Ensure the pot has drainage holes and adjust your watering schedule. |
| Slow Growth Post-Repotting | Pot too large or over-pruned roots | Be patient, provide optimal care, and consider downsizing the pot if necessary. |
| Root Rot | Overwatering or poor drainage | Remove affected roots and repot in fresh soil, ensuring proper drainage. |
FAQs
Can I use garden soil for indoor plants?
It’s best to use potting mix specifically formulated for indoor plants, as garden soil can be too heavy and may contain pests or diseases.
How do I repot plants with sensitive roots, like orchids?
Be extra gentle, use a specialized orchid mix, and avoid disturbing the roots more than necessary.
Is it okay to reuse old potting soil?
It’s best to use fresh potting mix to ensure proper nutrients and reduce the risk of disease. If you must reuse old soil, mix it with fresh soil and check for pests.
By following this guide, you’ll be well-equipped to give your indoor plants the refresh they need. Remember, each plant is unique, so don’t be afraid to adjust your approach based on your plant’s specific needs.
Happy repotting! We’d love to hear about your repotting experiences!